
Photoshop: odstranite rumen odtenek - kako deluje
V Photoshopu lahko enostavno odstranite neželene barvne premike, kot je rumen odtenek. V tem praktičnem nasvetu vam pokažemo, kako naprej.
Odstranite rumen odtenek v Photoshopu: ravnotežje bele s slikami v RAW formatu
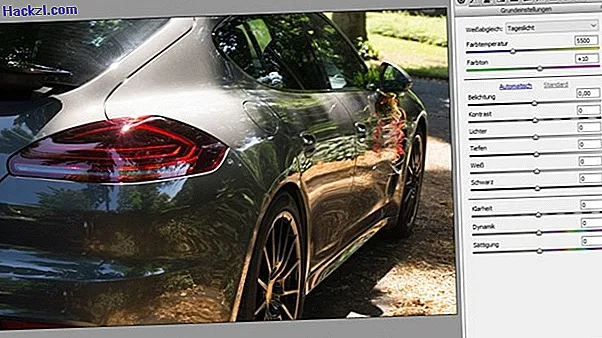
Najlažji način za rešitev rešitve je, da so vaše slike v formatu RAW. Ko se odprete s programom Photoshop, se samodejno prikaže veliko pogovorno okno, v katerem lahko nastavite vse vrste stvari.
- S spustnega menija "White balance" lahko izbirate med nekaj vnaprej določenih barvnih temperatur, ki večinoma ponujajo primerno nastavitev za vašo sliko. Prilagodite ravnotežje beline na fotoaparatu, da preprečite premik barve.
- Lahko pa se seveda previdno poigrate z barvno regulacijo temperature, da odstranite rumeni odtenek s slike. Ne pozabite upoštevati barvnega tona za končno nastavitev.
- Na voljo imate tudi dodatne nastavitve osvetlitve.
Odstranjevanje rumenega odtenka: prilagoditev s pomočjo gradbenih krivulj CMYK
Če vaša slika ni v formatu RAW, ampak samo v formatu JPG, še vedno obstajajo natančni načini za odstranitev rumenega tona s slike.
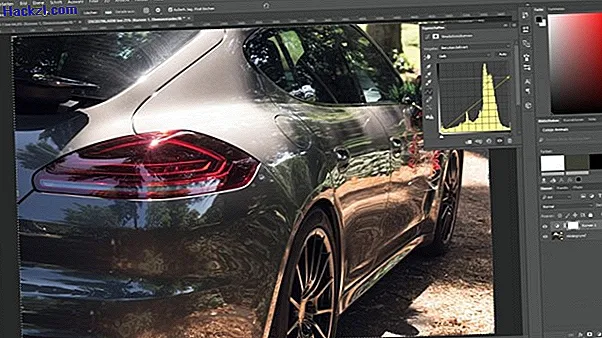
- Najprej pretvorite svojo sliko v črnila CMYK, da boste lahko rumeno kot barvni ton obdelali izolirano. Če želite to narediti, kliknite na "Slika", "Način" in na koncu na "CMYK barvo".
- Ker je CYMK večji barvni prostor v primerjavi z RGB, Photoshop natančne barvne tone ceni. To se naredi z barvnimi profili. Preverjanje barv morate potrditi v ločenem pogovornem oknu.
- Z gumbom s pol napolnjenim krogom v pregledu ravni ustvarite novo raven nastavitve in izberite krivuljo gradacije.
- V novo odprtem oknu lahko v spodnjem spustnem meniju izberete rumeno barvo. Nato v zgornjem desnem kotu groba povlecite nekoliko navzdol, dokler ne dobite rezultata slike.
Rumeni odtenek v Photoshopu: prilagoditev z barvno barvo in odtenkom / nasičenostjo
Drug preprost, a uporaben način za odstranjevanje rumenega odtenka je prilagoditev s pomočjo drsnikov "Barvno ravnovesje" in "Odtenek / nasičenost"
- Do "Barvne uravnoteženosti" lahko dostopate z gumbi "Slika" in v meniju "Popravki". "Hue / Saturation" lahko najdete v istem meniju. Igrajte se z kontrolami, dokler vam rezultat ne bo všeč.
- Vse nastavitve s tega območja morajo biti usklajene, zaradi česar je ta postopek nekoliko okorno in brez težav. Rezultat večinoma ni tako lep kot krivulja gradacije, ker se izgubi nekaj informacij o sliki.

Adobe Photoshop CC: Inovacije v prvem testu
Ta praktični nasvet vam pokaže, kako spremeniti barvo oči s programom Photoshop.